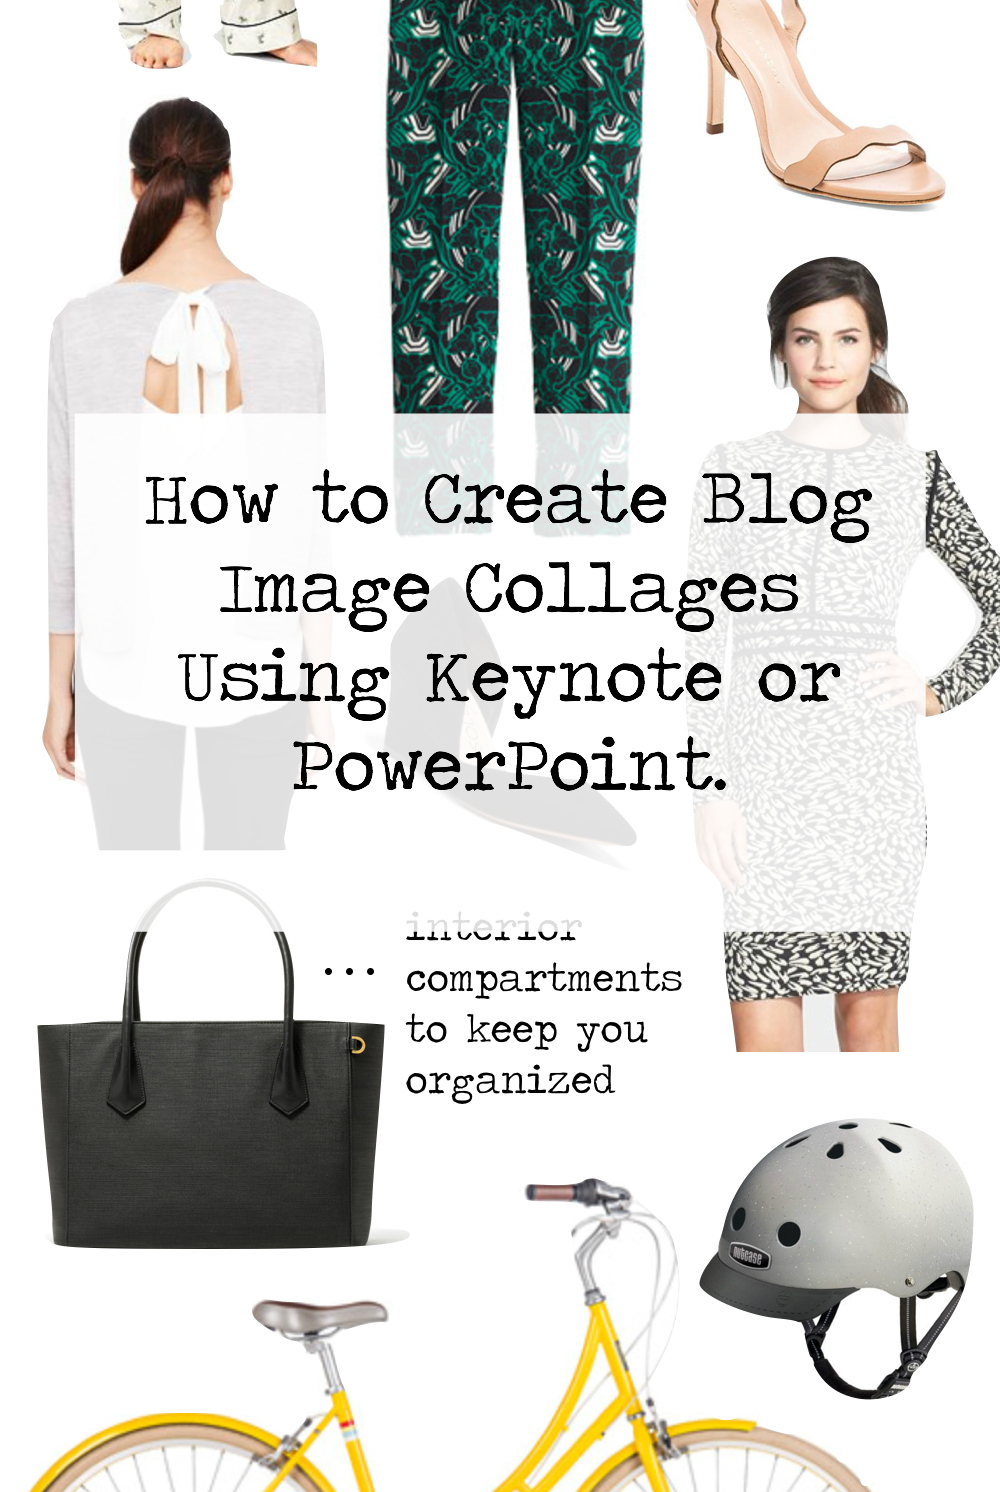
how to create blog image collages in keynote.
I’ve been asked a few times about how I create image collages for the blog (like in yesterday’s February Cravings post) and for awhile, I was a bit embarrassed to fill you guys in on it. I will never pretend to be a design expert or that I actually know what I’m doing when it comes to fancy programs like Photoshop or InDesign (so uh, if you’re a designer, please just cover your eyes for this one), but you know what, I’ve kind of made it work. And it’s awesome if you guys can make it work too using a lovely little program you probably already have on your laptops – Keynote or PowerPoint. Yep, I said it. I create all of my blog images in Keynote. Sometimes you’ve gotta fake it til you make it!
I’ll be showing how to create photo collages using Keynote, because it’s what I have on my current Macbook, but I promise you can do the exact same thing in PowerPoint as well. Either works!
To start, gather all of the images you want to feature – on my Mac I use Command + Shift + 4 to just grab a little screenshot of the image directly from the website or store. It’ll make your life easier if you can find an image with a white background, but it’s not the end of the world if there’s not one available (I’ll touch on that in a bit). I usually create a folder with the post title and just save every image there so it’s easy to have everything in one place and keeps my desktop from getting to insane.
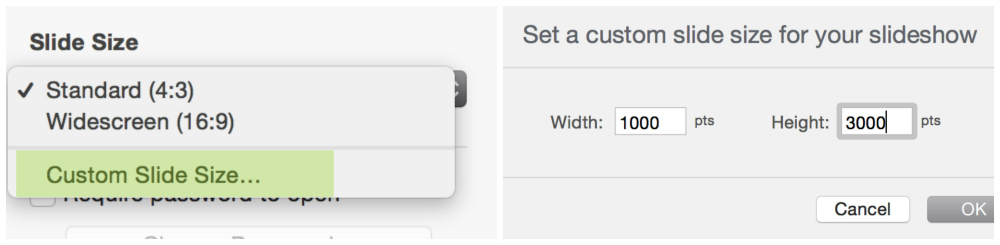
Once you have all of your images collected, open up Keynote and start a new document with a plain old white background. Select “Format” (upper right corner, the icon looks like a little paint brush) and then click “Edit Master Slide”. After you’ve opened up the master slide editor, select “Document” from the icons in the upper right corner, and choose “Custom Slide Size” – these dimensions really vary depending on your blog layout, but you’re looking to create a slide size that’s as wide as the post column of your blog, and long enough for you to have some fun and be able to include lots of images. For my images, I have my slides at 1000×3000 which allows me to upload the images right to WordPress at that size which helps with image quality, especially within text on the image collages. Now that you’ve got your dimensions all set and ready, close out of the master slide editor by selecting the little “done” button at the bottom of the screen.

So things should look like this now – a niiiiice clean slate for you.
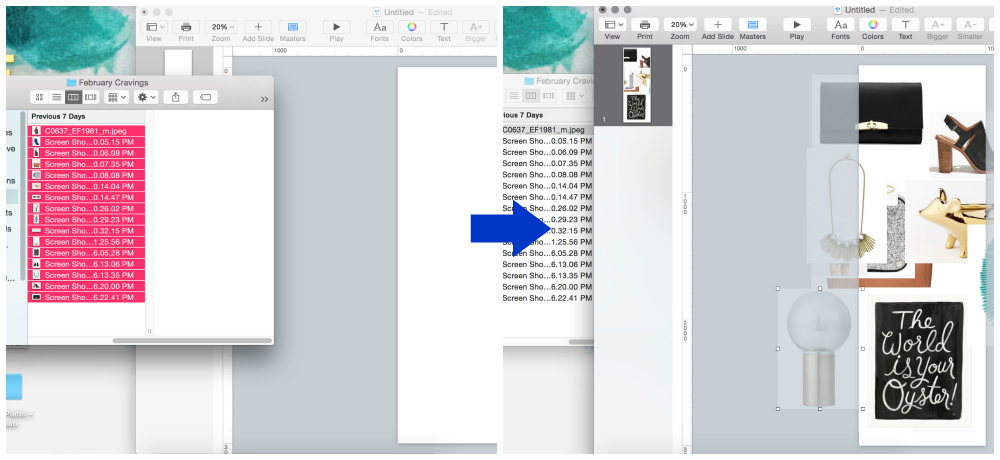
Now go to your folder with your screenshots and simply select ’em all and drag into Keynote. Don’t worry about sizes or their order yet – I like to drag them over into the grey area on the sides so I can see the entire “blank slate” area at once to get an accurate read on how things should map together or what the flow should be.
If you’d like to add a title or any text to your image collage, go ahead and add a text box – I’ve found it really helps if you’re consistent with the fonts and font sizes you use on all blog graphics and the nice thing about doing image collages in Keynote is that you’re able to essentially create templates for yourself as you go along by creating all of the image collages as new slides within the same presentation. This makes it super simple to quickly grab bits of text from other posts and just update the copy – the goal here is to be as efficient as possible while still making your blog look consistent visually.

With the title out of your way, now you can easily resize each screenshot to fit within the image collage by selecting each image and dragging on its corners to change its size. If an image has a non-white background, select it and then click the “Format” icon in the upper right. Click over to the “Image” tab in the menu that will open up on the right side of your slide and select “Instant Alpha” – for this part you may want to zoom in so you can see better (especially important if your image has any white in it or is some crazy shape). Using the “Instant Alpha” tool, click and drag within the background area you’d like to remove – any section that appears colored while you’re pressing down the mouse will be instantly removed once you unclick (unfortunately I can’t grab a screenshot of this process but play around with it and you’ll understand what I mean – it’s basically magic!). The “Instant Alpha” tool is also great for removing the background whitespace of your images so it’s easier to layer them over each other for a tighter collage. If you need to crop down any of your screenshot images, select the image and then click “Format” and then within the “Image” tab again – select “Edit Mask” (right above that “Instant Alpha” tool we just used) and crop the image by dragging over the black dots that will pop up.
When it comes to the actual layout of the collages, I just eyeball it and try to leave enough whitespace between each image so that the collage doesn’t appear too cluttered. It’s also ideal when the image collage ends with images in a nice straight line on the bottom so things are balanced out.
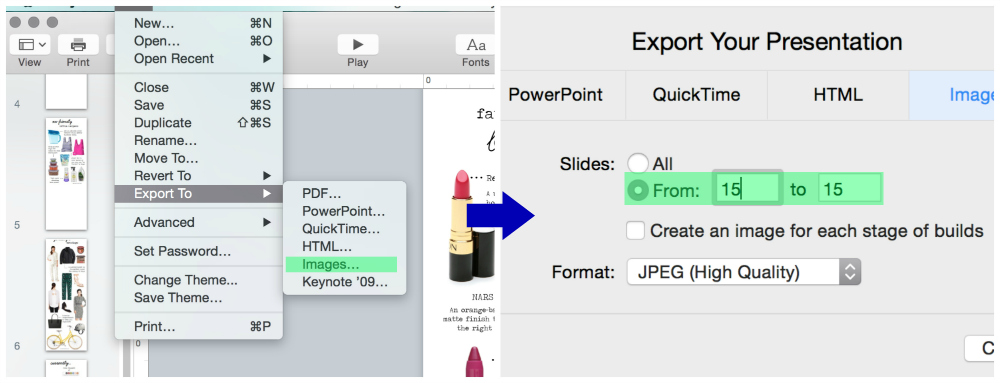
Once you have things arranged to your liking and you’re done making edits, select “File” in the top navigation bar and choose “Export To..” and “Images”. To export only one slide vs. the entire presentation, uncheck “All” and enter the slide number you’re looking to export in both fields of the “From” option. Choose “JPEG (High Quality)” as your format and click “Next” and save the image somewhere on your desktop.
If you’re working within a template like I do, your images will often need a little cropping to get rid of any excess whitespace. I use PicMonkey for this and I just do a quick upload to PicMonkey and crop the image height to the correct size. Then save out your final file and you’re done!
So there you have it, I’ve spilled all of my self taught random blog design secrets for you. If you have any questions, just leave me a comment or shoot me an email at hello@prettyandfun.com and I’m happy to help.